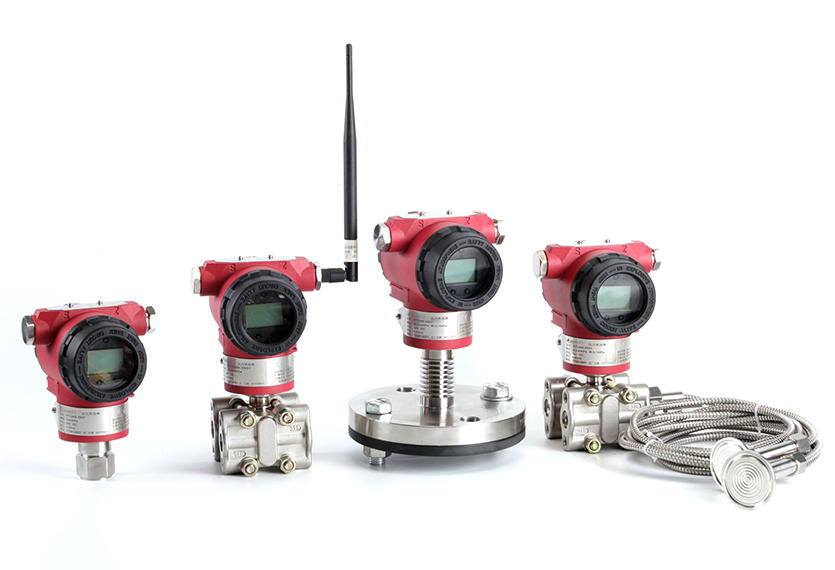
- Pressure Sensor, Pressure Transducer, Pressure Transmitter


- 2020-06-30
- Zhyq
- 130
How to Calibrate a Pressure Transmitter
Pressure transmitters used in the process industries are very durable and reliable instruments. Even so, they still require periodic maintenance and calibration to ensure optimal performance. This is an area of confusion for many. Typical questions include:
- Are we calibrating our transmitters too often, resulting in excessive downtime and unnecessary maintenance expenses?
- Are we calibrating our transmitters too infrequently, resulting in quality issues and possible loss of product?
- Are we calibrating our transmitters correctly?
As with most things in life, there is no “one size fits all” answer. However, there are simple best-practice guidelines, which can be modified to fit specific applications. This article helps answer the basic questions facing process plant personnel with regard to calibration.
How often?
Each process plant has to determine correct calibration intervals based upon historical performance and process-related requirements. Factors you need to consider that may influence this decision are:
- Are there any local, national, safety, or environmental regulations that must be observed?
- What is your reason for requiring calibration: quality, safety, or standard maintenance?
Process conditions
- Is there a homogeneous process fluid with a stable pressure/temperature?
- Will the process conditions fluctuate significantly?
- Is there risk of buildup, corrosion, or abrasion to the pressure transmitter?
- Will heavy vibration be present?
Ambient conditions
- Will the pressure transmitter be installed in a well-controlled environment with low humidity, normal or stable temperatures, and few contaminants, such as dust or dirt?
- Is an outdoor transmitter exposed to widely varying weather conditions or high humidity?
If you have no significant history or regulatory requirements to guide you in developing your calibration procedures, a good place to start is with the following general guidelines.
- Direct-mounted pressure transmitters installed inside in a controlled environment on a process with stable conditions should be calibrated every four to six years.
- Direct-mounted pressure transmitters installed outside on a process with stable conditions should be calibrated every one to four years, depending upon ambient conditions.
If a remote diaphragm seal is employed on a pressure transmitter, the calibration interval should be reduced by a factor of two (i.e., a four-to-six year interval is reduced to two to three years). This is because a remote diaphragm seal employs more fill fluid than a direct-mounted configuration. Consequently, it will experience more mechanical stress from process or ambient temperature fluctuations. Most remote diaphragms are flush faced where the diaphragm/membrane is susceptible to physical damage (dents or abrasions) that can cause offset or linearity issues. If the process regularly experiences significant pressure swings or overpressurization events, reducing the calibration interval by a factor of two is a good rule of thumb.
How accurate?
How good is good enough? In other words, what is the maximum permissible error (MPE) for your calibration? Many make the mistake of adopting the manufacturer’s reference accuracy as their calibration target. Unfortunately, this means they will have an MPE that is too tight, with a high rate of nonconformance in their calibration process. In the worst case, with a very tight tolerance MPE, it may not be possible for their field or lab test equipment to calibrate some of their transmitters.
A manufacturer’s reference accuracy is based upon tightly controlled environmental conditions that are seldom, if ever, duplicated in a plant environment. Using that reference accuracy for a calibration target also fails to take into account the long-term stability of the instrument.
Over time, all instruments experience slight accuracy degradation due to aging and simple wear and tear on mechanical components. This needs to be considered when establishing the MPE. In general, unless there are mitigating circumstances, it is better to set a reasonable MPE that is achievable with standard field and lab test equipment.
Test equipment starts with an accurate pressure source to simulate the transmitter input. The corresponding output is measured with a multimeter for a 4–20 mA transmitter, or with a specialized device for smart transmitters with digital outputs, such as HART, FOUNDATION Fieldbus, Profibus, or EtherNet/IP.
The test equipment you intend to use should be traceable to the National Institute of Standards and Technology. As a general recommendation, your reference equipment should be at least three times more accurate than the pressure transmitter being calibrated.
Performing the calibration
Once you have established the calibration interval and MPE, you are ready to perform the actual calibration procedure on your pressure transmitter. The best-practice recommendation is:
- Mount the transmitter in a stable fixture free from vibration or movement.
- Exercise the sensor or membrane before performing the calibration. This means applying pressure and raising the level to approximately 90 percent of the maximum range. For a 150 psi cell that means pressurizing it to 130–135 psig. Hold this pressure for 30 seconds, and then vent. Your overall results will be much better than if you calibrate “cold.”
- Perform a position zero adjustment (zero the transmitter). This is important because the orientation of the fixture used for calibration may be different than the way the transmitter is mounted in the process. Failing to correct for this by skipping this step can result in nonconformance.
- Begin the calibration procedure. Typically this means three points up (0 percent/50 percent/100 percent) and then three points down. The 4–20 mA output should be 4 mA, 12 mA, and 20 mA at the three points (or the correct digital values for a smart transmitter). Each test point should be held and allowed to stabilize before proceeding to the next. Normally that should take no more than 30 seconds. You can use more points if you require a higher confidence in the performance of the instrument.
- Compare the results of your pressure transmitter to your reference device.
- Document the results for your records.
The calibration should be performed in as stable an environment as possible, because temperature and humidity can influence the pressure transmitter being tested as well as the pressure reference. If the results of your calibration are within the MPE, do not attempt to improve the performance of the transmitter.
One mistake many end users make is to regularly perform a sensor trim adjustment of their pressure transmitter—even on new units. A sensor trim corrects the digital reading from the sensor after the analog/digital conversion. Performing a sensor trim on a new transmitter is essentially a single-point calibration under the current plant environment conditions, as opposed to sticking with the original factory calibration.
Factory calibrations of pressure transmitters are performed in a tightly controlled environment and incorporate as many as 100 test points. Performing a sensor trim on a new pressure transmitter under field conditions will cause the unit to operate at less than optimal capacity. A sensor trim should only be performed by a qualified technician under the manufacturer’s guidance.
Who should perform the calibrations?
Even with the sophisticated calibration and reference equipment currently available, there is no substitute for a properly trained technician when it comes to calibrating pressure transmitters. Not only does the technician need to be trained on the mechanics of the calibration process, he or she also must be equally qualified in completing and maintaining the documentation. Repeatability is the key. In the world of calibration, if it is not properly documented, it did not happen.
Occasionally there are calibrations that cannot be performed in a standard maintenance shop by maintenance technicians. For these cases, an ISO 17025–accredited organization is required. Not only can an ISO 17025–accredited organization perform more stringent calibrations, it provides other value as well:
- Accredited labs can simplify the calibration audit process.
- The process and methodology used by an accredited lab is extremely repeatable, thus there is a high level of confidence in the results from an auditor’s perspective.
- Annual audits of the accredited lab ensure it is consistently performing at a high level for its registered scope of work.
The “correct” calibration cycle for a pressure transmitter depends on the purpose of the calibration and the application. The same pressure transmitters employed in different operating units or processes at the same plant may require different calibration intervals.
Even more important than the calibration interval of the instrument are:
- establishing correct and realistic MPEs
- following correct calibration procedures
- properly training the person performing the calibration
- properly documenting calibration results
Following these guidelines and using judgment based on actual plant operational conditions will help establish proper calibration practices, saving money while maintaining acceptable performance.
From isa.org
Leave Your Inquiry
Your email address will not be published. Required fields are marked *

